 |
| Toss in a mini gel pen and mini binder clip covered in a fuzzy white vinyl scrap and tie on ribbons, voila! Giftie!!! |
 |
| This shows how the notepad is bound at the top with the Modge Podge. |
 |
| Toss in a mini gel pen and mini binder clip covered in a fuzzy white vinyl scrap and tie on ribbons, voila! Giftie!!! |
 |
| This shows how the notepad is bound at the top with the Modge Podge. |


| Close up of the slightly tan and speckled Club Scrap Scholarship Kit cardstock that I used for this project. |
 |
| Printed an 8x6 area to cut the card from. |
 |
| Card base cut out of Imagine printed rectangle. |
 |
| Turned the mat around and printed and cut the top layer of the shied and the blackout. Everything cut at 5" relative, If I had it to do over I would do 5.5" or 6". |

Supplies List:
5x7" metal flashing sheet EDIT: these are available at your local home improvement stores :)
Staples transparency
Staz-on ink in Black and Azure
Crop-a-dile hole punch
Glossy Accents
small neodium magnets
binding clips
from Club Scrap:
Bookgbinding glue
foam brush
Pure and Simple: green cardstock, black and white/green ribbon, photo turns
black waxed linen/ bookbinding needle
Turquoise ribbon
Stamps are Unmounteds from Refresh Your Soul, Memoirs and Blossom font
I started out by "sewing" the green cardstock to the transparency by first poking holes through both layers and then used the waxed linen to do the wrap around stiching.
Next I stamped on the transparency, and then used the Club Scrap bookbinding glue to secure the paper to the metal sheet.
Punched two holes at the top with the crop-a-dile and pulled ribbon through to make a knot on each side, decorate clips and photo turns with ribbon.
Use glossy accents to glue magnets to the backs of the phototurns.
Voila!
This project and all of my Home Decor projects were inspired by a 2007 Paper Crafts Magazine: Room to Room.
The next stop on the hop is the Fabulously Crafty Alina at http://www.neverstopscrapping.blogspot.com/
For blog candy I'm giving way....All of the projects featured on my blog for this hop! Just leave me a comment for this post :) Thanks so much for stopping by!
 |
| From Pages Of Pictures |
 |
| From Pages Of Pictures |
This is a close up of the rosettes, he pink is scored at 1/2" space and the gray is scored at 1/4" intervals. I had to use 24" of paper for the pink and 12" for the gray.
Here is where instrucitons and my inspiration for the rosettes came from: http://pattisscrapingtime.blogspot.com/2011/03/how-to-make-my-birthday-badge.html
 Thanks so much for stopping by!


-Flowers were cut from Cricut Mother's Day Bouquet at 3 and 31/2"
-Each pin has 4 cut out flowers, two 3" pink flowers and two 3.5" green flowers.
-One of each color flower are dipped in UTEE. I used the melting pot for this but you could do the standard ink and dip in powder to heat.
-Green Tulle layers are from my stash.

-Clothes pin accent from Club Scrap.
Everything is held together by a long brad.
Thanks for stopping by today!
Cape Cod Scrapper the drop spine box at Mid-Michigan Swarm(Crop) and Memoies Expo Columbus 2011. This is how the box will look when we are done in the class. It is a blank canvas for any embellishing your heart desires.
 picture.
 Had to add this pic of my kitty trying to get into the pics :)

First I printed the light pink paper with polka dots on my Cricut Imagine.
All papers/cardstock are from Club Scrap Jubilee collection except the white that I printed on is Club Scrap Basics White.
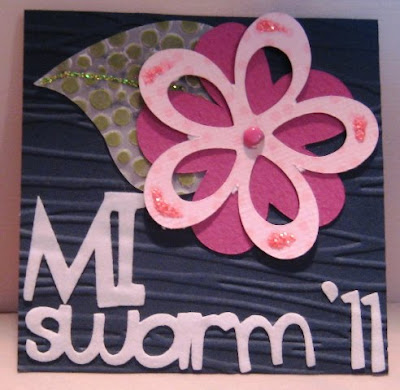
Flowers and leaf are cut from Mother's Day Bouquet.
Midnight blue and White vellum are embossed with Cuttlebug weathered stripes and bubbles.
Used Cuttin Up font for the lettering, welded with the Gypsy, cut in White fuzzy vinyl from Silouhette. Brads are from my stash.
Stickles in lime green on the leaf and Distressed Stickles in worn lipstick on the flower petals
TFL